This post will cover creating an ImageMosaic data store with GeoServer.
If you have image files prepared, you can skip the “Prepare Files” section below.
Prepare files
We will use the London GeoTIFF image from PlanetSAT geospatial-data-samples to create our mosaic.
Create new directory ‘london’ in your GeoServer data/data directory.
su - tomcat
cd /home/tomcat-version/webapps/geoserver/data/data
mkdir london
cd london
wget https://demo.planetobserver.com/PlanetObserver_PlanetSAT_10m_UK_London_UTM30.zip
unzip PlanetObserver_PlanetSAT_10m_UK_London_UTM30.zip
rm -f PlanetObserver_PlanetSAT_10m_UK_London_UTM30.zip
Now, still in our ‘london’ directory, let’s use gdal to create our tiles:
mkdir tiles
gdal_retile.py -v -r bilinear -levels 1 -ps 512 512 -co "TILED=YES" -co "COMPRESS=JPEG" -targetDir tiles PlanetObserver_PlanetSAT_10m_UK_London_UTM30.tif
After this we can remove the large TIFF file.
Note: gdal_retile.sh is part of the gdal-bin package in Ubuntu.
Create a Workspace
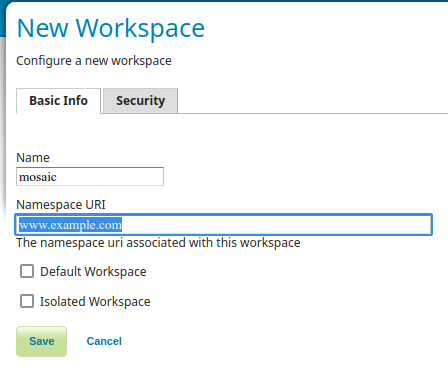
We’ll create a workspace, called “mosaic” as below.
Optional: Use PostGIS
The ImageMosaic plugin generates a shape file for use with the Mosaic.
If we wish to store this information in a PostGIS database, we can do so by adding a datastore.properties file to the Mosaic directory.
You will need an existing PostGIS database or to create a database (it will not be created for you).
The contents of the datastore.properties file should look as below.
SPI=org.geotools.data.postgis.PostgisNGDataStoreFactory
host=localhost
port=5432
database=mydb
schema=public
user=mydbuser
passwd=SuperSecret
Loose\ bbox=true
Estimated\ extends=false
validate\ connections=true
Connection\ timeout=10
preparedStatements=true
Create the Data Store
Go to Data / Stores/ Add New
Click on ImageMosaic in Raster Data Sources
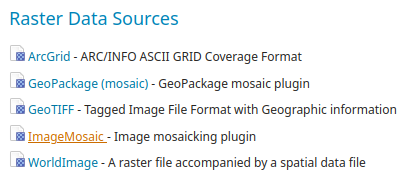
Select our workspace (mosaic) and enter “london” as store name
Browse to the $MOSAIC_DIR/ as URL.
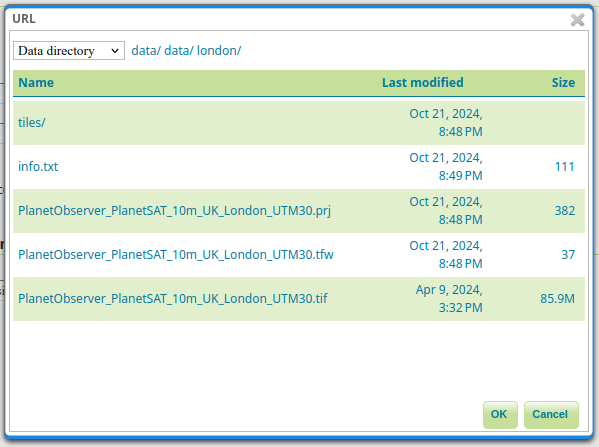
Click OK and then click Save
Create a New Layer
Go to Data / Layers / Add a new layer
Select the mosaic:london entry
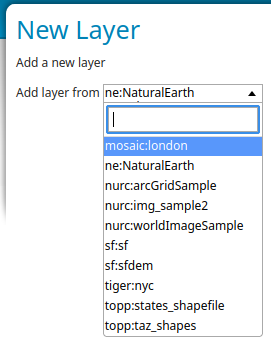
Click on Publish.

You will be taken to the “Edit Layer” menu, where you can change some parameters.
You can edit various layer properties, as title, abstract, etc. In “Coverage Parameters” you can set ‘Multithreaded granule loading’, if you have multi-core CPU.
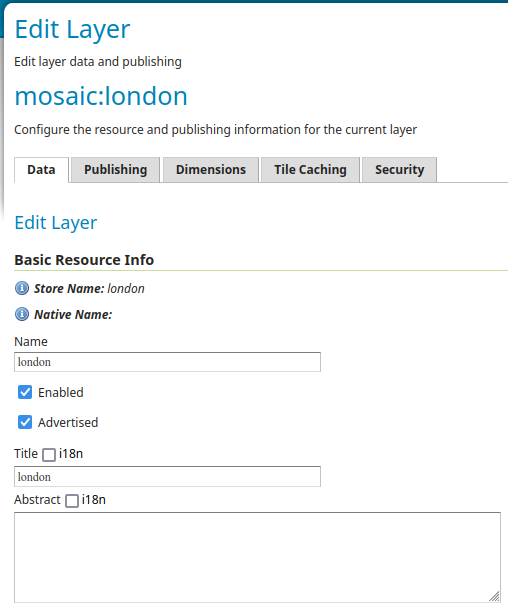
When ready, click the Save button.
View the Mosaic
Go to Data / Layer Preview
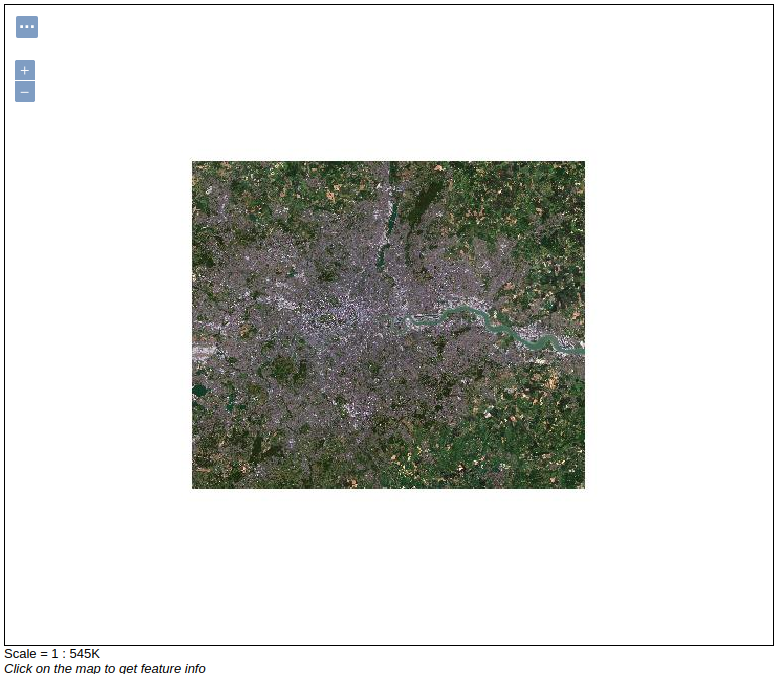
Find the “mosaic:london” in Name column. You can use the search box on top

Click on OpenLayers to view it. You can zoom in/out and move around the map.
You can learn more about the ImageMosaic Data Store at:
https://docs.geoserver.org/main/en/user/data/raster/imagemosaic/index.html

 PostGIS
 Mobile
 QGIS
QGIS MapBender
 GeoServer
 GeoNode
 GeoNetwork
 Solutions


