This post will cover creating an ImagePyramid data store with GeoServer.
If you have image files prepared, you can skip the “Prepare Files” section below.
Prepare files
We will use the Sydney GeoTIFF image from PlanetSAT geospatial-data-samples to create our pyramid.
Create new directory ‘sydney’ in your GeoServer data/data directory.
su - tomcat
cd /home/tomcat-version/webapps/geoserver/data/data
mkdir sydney
cd sydney
wget https://demo.planetobserver.com/PlanetObserver_PlanetSAT_10m_Australia_Sydney_UTM56.zip
unzip PlanetObserver_PlanetSAT_10m_Australia_Sydney_UTM56.zip
rm -f PlanetObserver_PlanetSAT_10m_Australia_Sydney_UTM56.zip
Now, still in our ‘sydney’ directory, let’s use gdal to create our tiles:
mkdir pyramid
gdal_retile.py -v -r bilinear -levels 4 -ps 2048 2048 -co "TILED=YES" -co "COMPRESS=JPEG" -targetDir pyramid PlanetObserver_PlanetSAT_10m_Australia_Sydney_UTM56.tif
After this we can remove the large TIFF file.
Note: gdal_retile.sh is part of the gdal-bin package in Ubuntu.
Create a Workspace
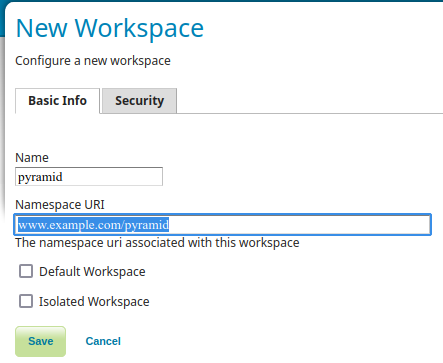
We’ll create a workspace, called “pyramid” as below.
Create the Data Store
Go to Data / Stores/ Add New
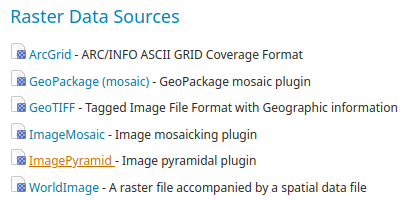
Click on ImageMosaic in Raster Data Sources
Select our workspace (pyramid) and enter “sydney” as store name
Enter file:/data/sydney/pyramid as URL.
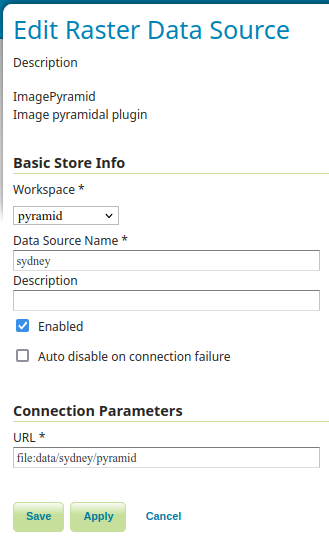
Click OK and then click Save
Create a New Layer
Go to Data / Layers / Add a new layer
Select the pyramid:sydney entry
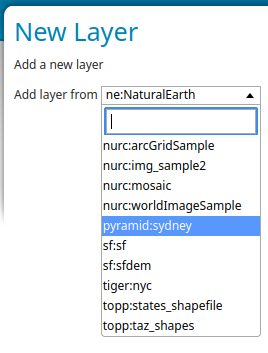
Click on Publish.

You will be taken to the “Edit Layer” menu, where you can change some parameters.
You can edit various layer properties, as title, abstract, etc. In “Coverage Parameters” you can set ‘Multithreaded granule loading’, if you have multi-core CPU.
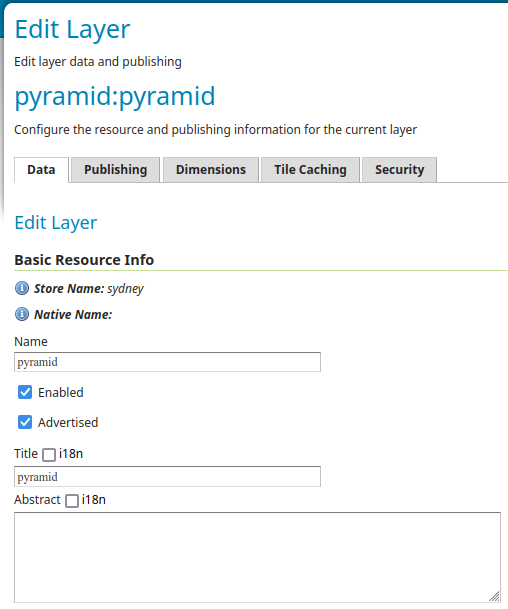
When ready, click the Save button.
View the Pyramid
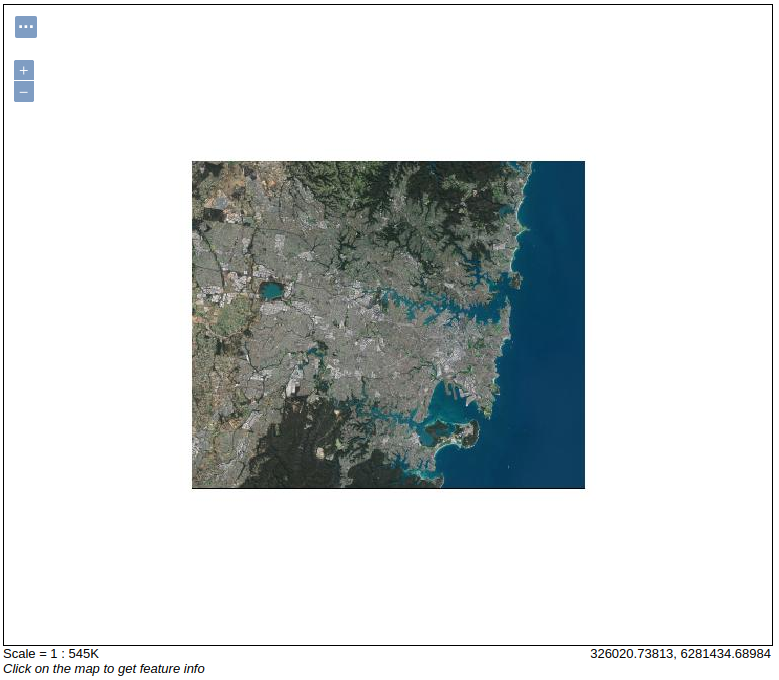
Go to Data / Layer Preview
Find the “pyramid:sydney” in Name column. You can use the search box on top

Click on OpenLayers to view it. You can zoom in/out and move around the map.
You can learn more about the ImagePyramid Data Store at:
https://docs.geoserver.org/main/en/user/data/raster/imagepyramid.html

 PostGIS
 Mobile
 QGIS
QGIS MapBender
 GeoServer
 GeoNode
 GeoNetwork
 Solutions


