


Information Resources
Below is part 2 of our Getting Started Series and covers where to find information and resources for your hosting services.

Below is part 2 of our Getting Started Series and covers where to find information and resources for your hosting services.
The video below is part 1 of our Getting Stared series and covers getting started with the AcuGIS portal and creating support tickets.
To add layers from your PostGIS database(s) to your QGIS Desktop, follow below.
1. Create a pg_service.conf entry for your database connection.
For example:
[demodb]
host=mydomain.com
port=5432
dbname=mydb
user=myuser
password=MyPassword
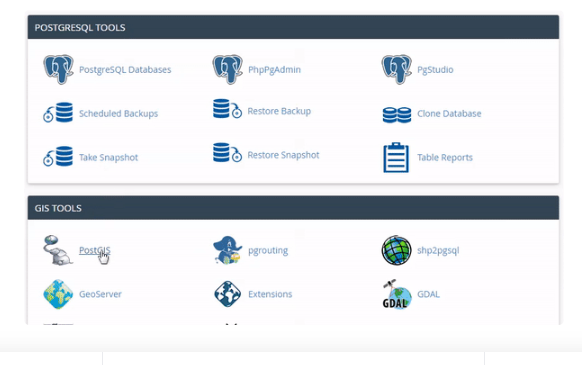
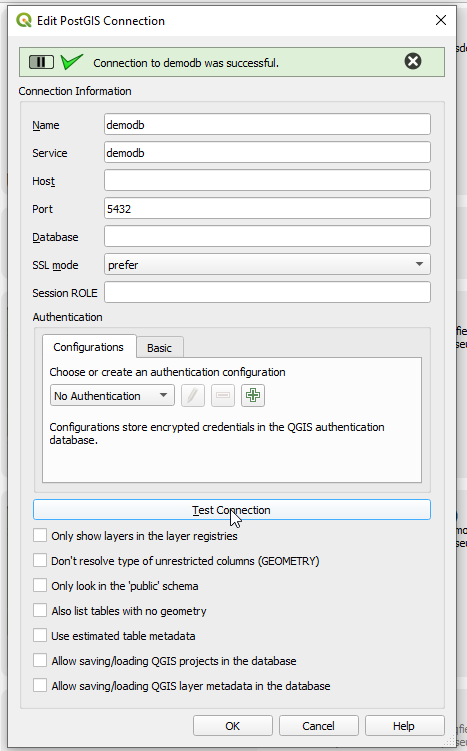
2. On the PostgreSQL icon in the left menu, right-click and select “New Connection”
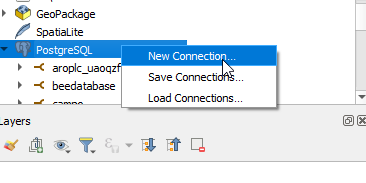
3. Give your connection a name and enter the Service name from your pg_service.conf entry (“demodb” in our example). Click Test Connection to test and then click OK.
3. Expand the node for the new connection you just created as shown below.

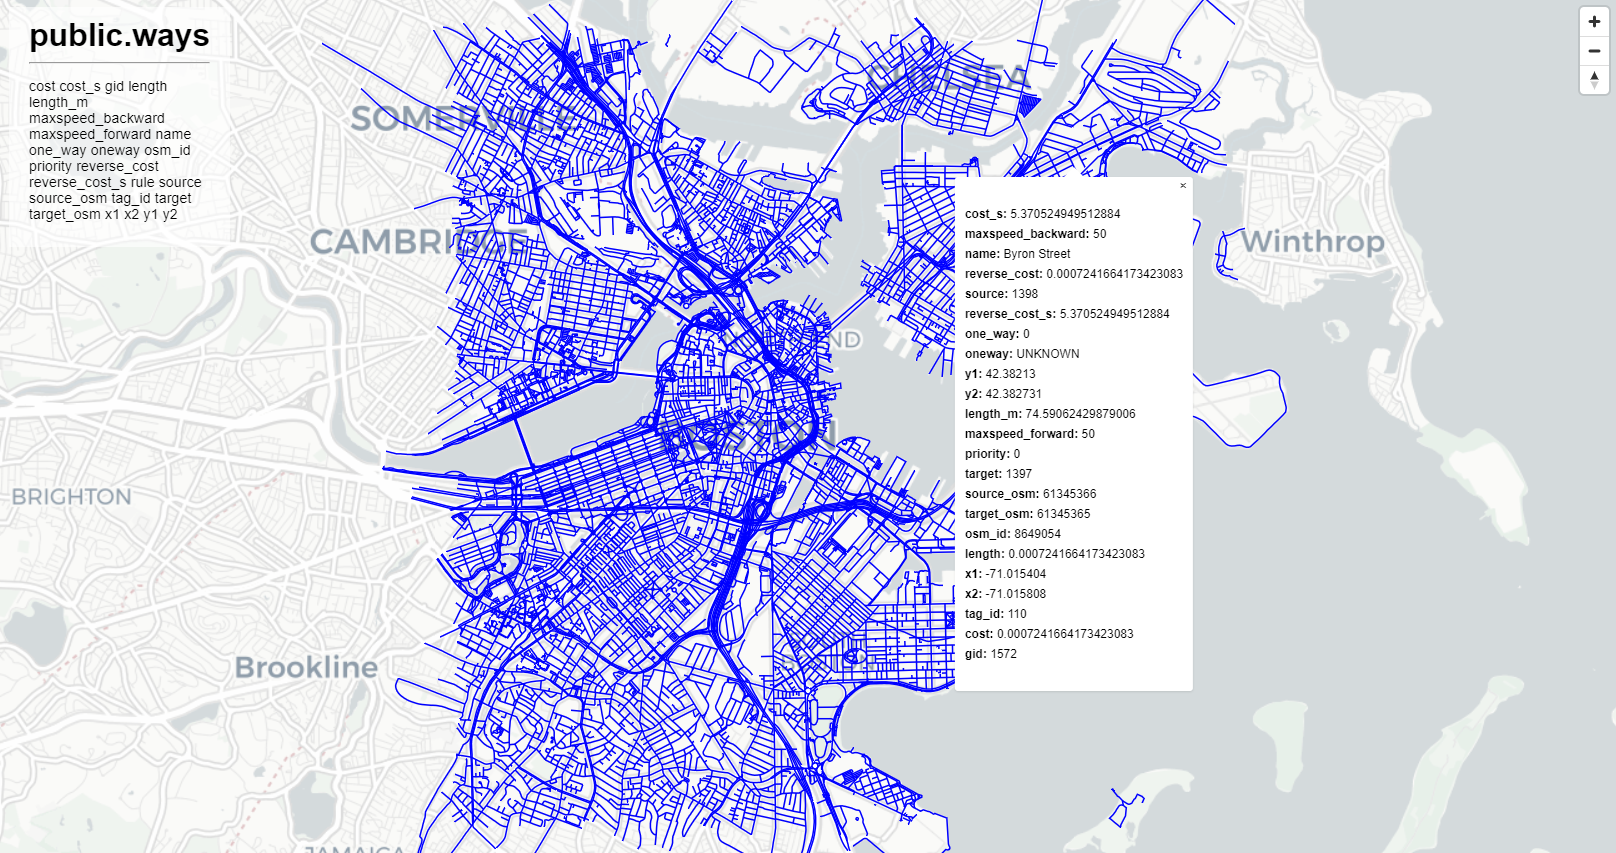
4. Right click on the table(s) you wish to add and select “Add Layer to Project”
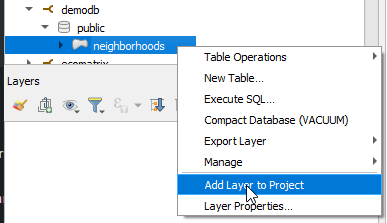
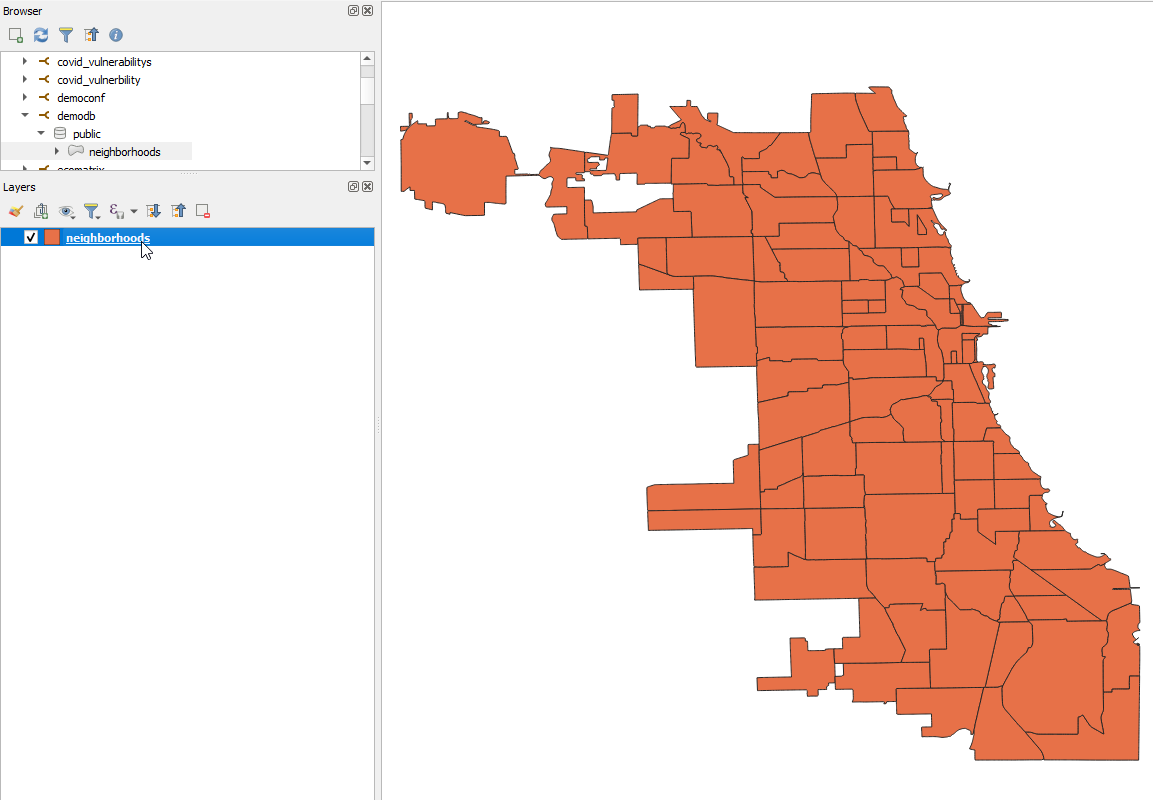
5. Your PostGIS layer has now been added!
Before publishing your layer to Lizmap, G3W-Suite, or QGIS Server, be sure there is a pg_service.conf entry corresponding to the one you created on the server.
For example:
[demodb]
host=localhost
port=5432
dbname=mydb
user=myuser
password=MyPassword
The file on the server is located at
/etc/postgresql-common/pg_service.conf
If you have any questions or require assistance, simply raise a support ticket and we are here to assist.
This post will cover loading shp files to your PostGIS database.
We’ll look at loading files via our shp2pgsql GUI in your control panel, as well as via command line (SSH) and via your desktop.
In this demonstration, we will be using the states_basic21.zip file from the ESRI ArcGIS site, which you can download at:
https://www.arcgis.com/home/item.html?id=f7f805eb65eb4ab787a0a3e1116ca7e5
If you do not already have a PostGIS database ready, you will need to:
1. Create a PostgreSQL database
2. Install PostGIS extensions into the database we created.
(Video tutorials courtesy of our brainfurnace.com site).
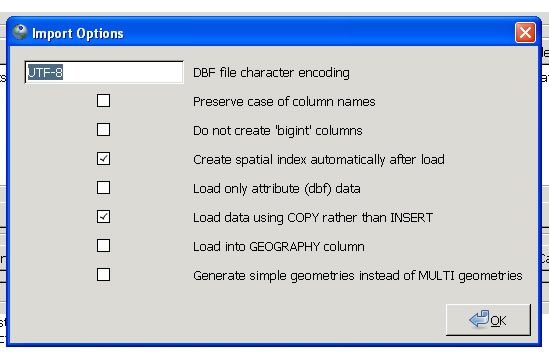
With our PostGIS database, we’ll load the ESRI file using the shp2pgsql tool in your control panel.

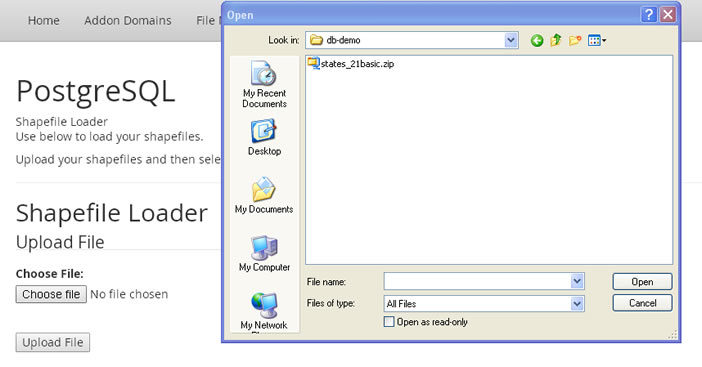
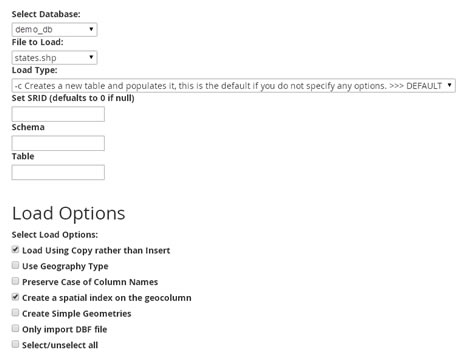
Using the defaults, which is fine for most cases, a new table called ‘states’ will be created with a GEOM column.
Optionally, you can set the table name to something else, set the SRID, append to an existing table, and specify the schema.
You can also load your shp files via the command line.
user@demo [~/home]# unzip – q states_21basic.zip
user@demo [~/home]# cd states_basic
user@demo [~/states_basic]#
user@demo [~/states_basic]# ls
./ states.dbf states.sbn states.shp states.shx
../ states.prj states.sbx states.shp.xml
user@demo [~/states_basic]# shp2pgsql states states | psql -d demo_db
Shapefile type: Polygon
Postgis type: MULTIPOLYGON[2]
Password:
SET
SET
BEGIN
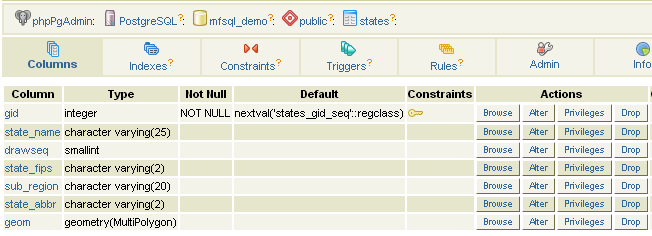
CREATE TABLE
ALTER TABLE
addgeometrycolumn
—————————————————–
public.states.geom SRID:0 TYPE:MULTIPOLYGON DIMS:2
(1 row)
INSERT 0 1
INSERT 0 1
INSERT 0 1
INSERT 0 1
INSERT 0 1
INSERT 0 1
INSERT 0 1
……………….
INSERT 0 1
COMMIT
user@demo [~/states_basic]#
For a list shp2pgsql command line options, see:
http://www.bostongis.com/pgsql2shp_shp2pgsql_quickguide.bqg
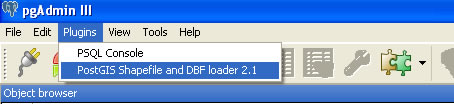
If you have installed PgAdminIII on your Desktop (or using the stand alone shp2pgsql GUI), follow below:
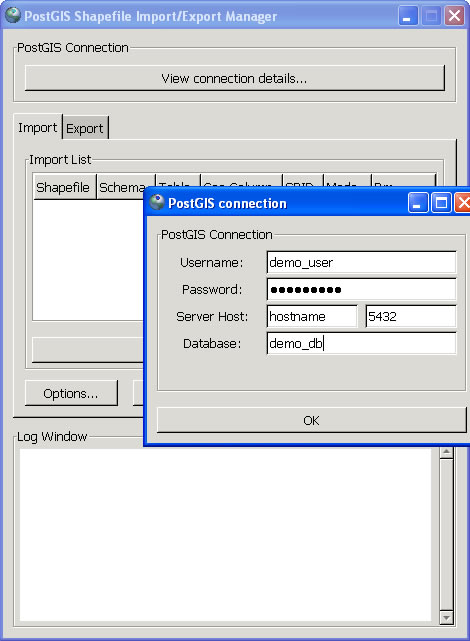
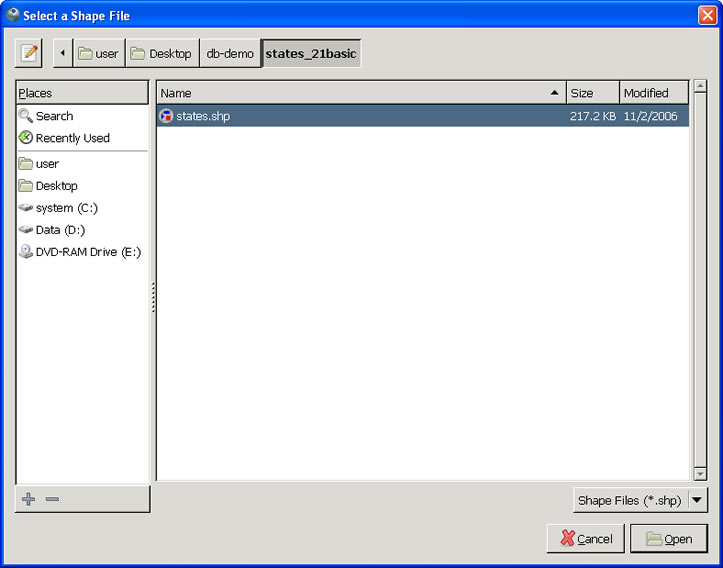
If all went well, you should see something like below displayed in the panel:
connecting: host=mydomain.com port=5432 user=demo password=’********’ dbname=demo_db
==============================
Importing with configuration: states, public, geom, C:\Documents and Settings\user\Desktop\db-demo\states_21basic\states, mode=c, dump=1, simple=0, geography=0, index=1, shape=1, srid=0
Shapefile type: Polygon
PostGIS type: MULTIPOLYGON[2]
Shapefile import completed.
NOTE: In all the above cases, we did not set a SRID. For our demonstrations with the states_basic21 file, this will not be an issue. In other instances, it will be required. We will look at setting the SRID, as well as updating it, in subsequent installments.
If you have any questions or require assistance, please create a support ticket.
AcuGIS offers two WordPress Plugins:
Leaflet Stand-Alone Plugin
Leaflet Studio Plugin
Add a New Map Layer (Tile Provider)
AcuGIS – Add a New Map Layer (Tile Provider) in Omeka
This video will show you how to Add a New Map Layer (Tile Provider) in Omeka using our plugin
If you have any questions or require assistance, please raise a support ticket and we are here to assist.
Add Custom Map Layer Group
AcuGIS – Add a Custom Map Layer Group in Omeka
This video will show you how to add Custom Map Layer Group in Omeka using our plugin
If you have any questions or require assistance, please raise a support ticket and we are here to assist.
AcuGIS – Add a Leaflet Map to Exhibits Item in Omeka
This video will show you how to add Leaflet maps to Exhibits in Omeka using our plugin
If you have any questions or require assistance, please raise a support ticket and we are here to assist.
AcuGIS – Add a Leaflet Map as Item in Omeka
This video will show you how to add Leaflet maps as Item in Omeka using our plugin
If you have any questions or require assistance, please raise a support ticket and we are here to assist.
AcuGIS – How to Install Omeka Leaflet Plugin
This video will show you how to install our Omeka Leaflet Plugin.
If you have any questions or require assistance, please raise a support ticket and we are here to assist.