 PostGIS
 Mobile
 QGIS
QGIS MapBender
 GeoServer
 GeoNode
 GeoNetwork
 Solutions


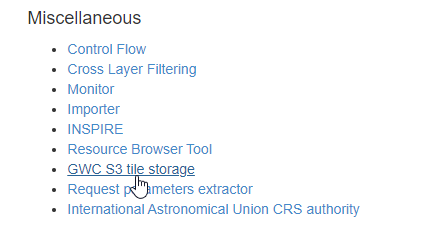
To enable GeoWebCache on s3 or s3 Compatible storage, follow below.
Install the plugin to match your GeoServer version.
Unzip into your /geoservr/WEB-INF/lib directory. Restart Tomcat to register plugin.
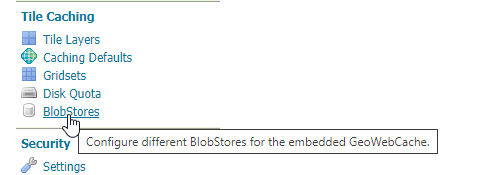
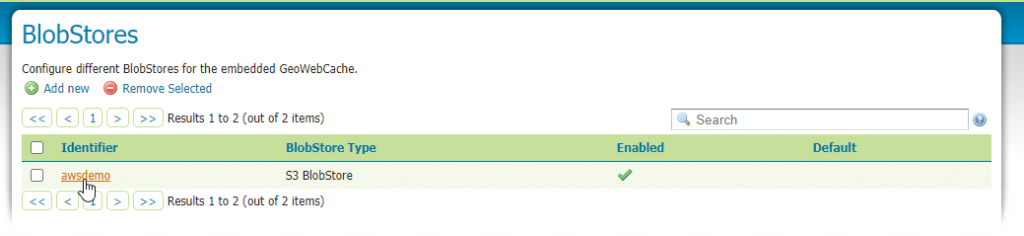
Go to Tile Caching and click the BlobStores link:
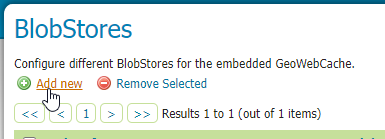
Click the Add New link:
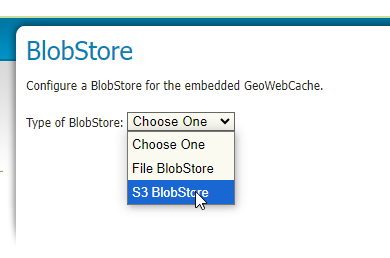
Under Type of BlobStore, select ‘S3 BlobStore’ from dropdown:
Populate the required fields:
- Identifier: A unique identifier for the BlobStore.
- Bucket: An empty bucket. If bucket does not exist, it will be created.
- AWS Access Key
- AWS Secret Key
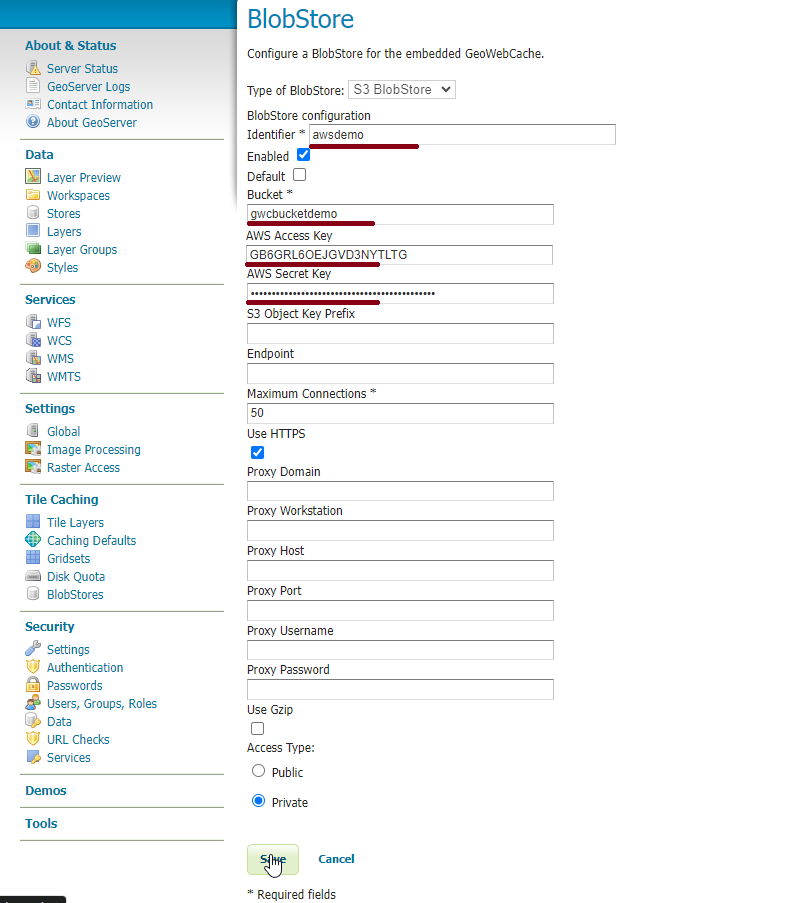
Click Save
You should now see the BlobStore listed:
Navigate to Layer you wish to cache on s3
Under BlobStore, select the BlobStore you created above from the dropdown.
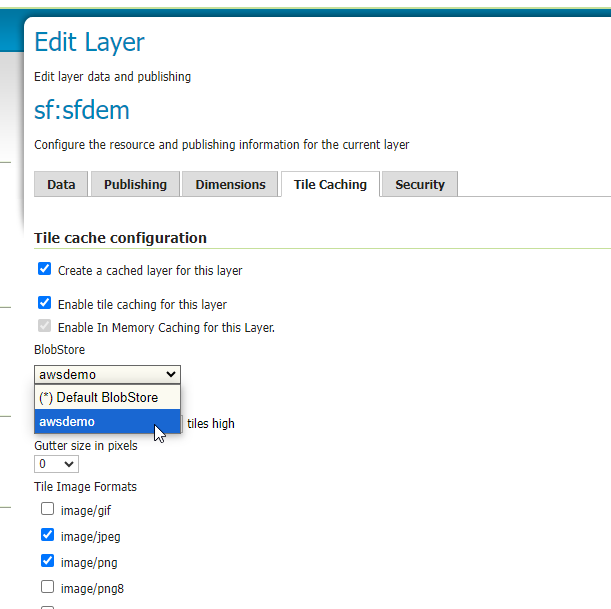
Click Save.
You can now seed the layer.

Once completed, check in your AWS Console that the layer has been seeded:
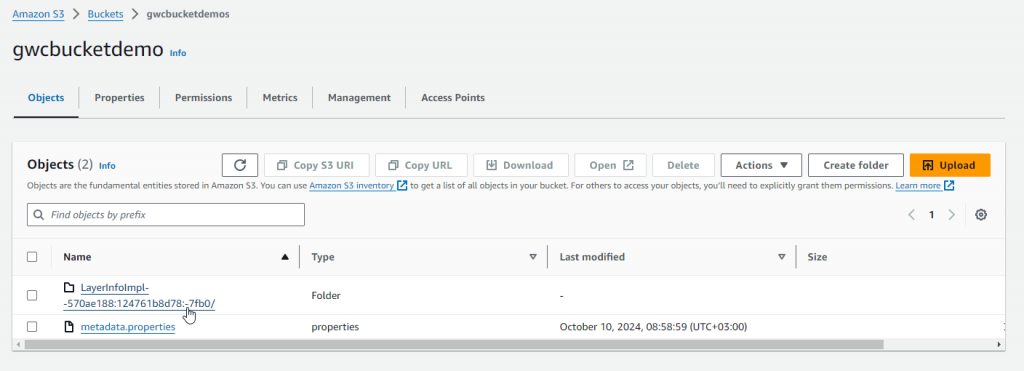
Congratulations. You created an s3 BlobStore and your layer is now being cached to s3.
The same procedure can be used for any s3-compatible storage such as DigitalOcean Spaces, Minio, etc…